


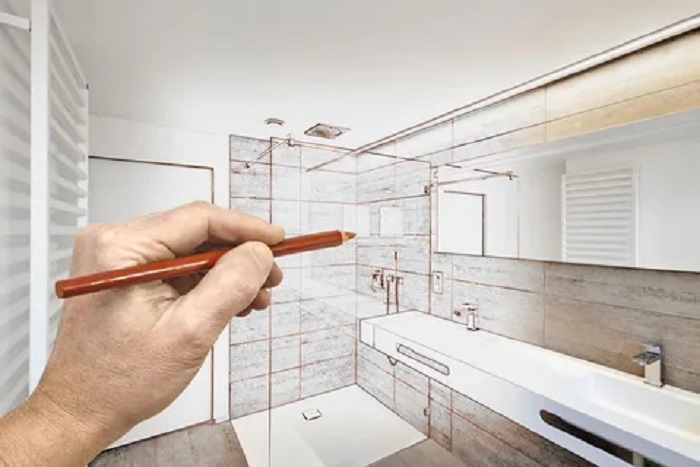
Bathroom remodeling mistakes to avoid: waterproofing, layout, and material choices
A bathroom remodel can dramatically improve comfort, safety, storage, and home value. It can also create expensive problems when decisions are made only around tile color and fixtures. Bathrooms are compact rooms with concentrated moisture, plumbing, electrical needs, ventilation, storage, and daily traffic. Every layer has to work together.
The most successful projects begin with a clear plan for water management and movement through the room. This guide explains common bathroom remodeling mistakes and how to avoid them before construction begins.
| Quick answer: The costliest bathroom mistakes are weak waterproofing, an impractical layout, inadequate ventilation, poor lighting, slippery materials, and insufficient storage. Resolve the technical system first, then select finishes that support it. |
Mistake 1: Treating tile as waterproofing
Tile and grout create a durable finish, but the finished surface is not the complete waterproofing system. Water can pass through joints, corners, penetrations, and microscopic openings. A shower or wet area needs a compatible substrate, waterproof membrane, properly treated seams, and correctly sealed transitions.
The slope of the shower base is also critical. Water must move toward the drain rather than collect at edges. Niches, benches, curbs, plumbing penetrations, and changes of plane require careful detailing because these are common failure points.
· Confirm the waterproofing method before tile selection.
· Use compatible components from a tested system whenever possible.
· Treat corners, seams, niches, benches, and penetrations carefully.
· Allow required curing and flood-testing time where applicable.
· Do not cover moisture concerns with new finishes without finding the cause.
Mistake 2: Keeping a poor layout because moving fixtures feels difficult
Not every bathroom needs a completely new floor plan, but preserving an inefficient layout can limit the value of the remodel. A door that collides with a vanity, a toilet crowded beside a shower, or a narrow path between fixtures will remain frustrating after expensive finishes are installed.
Before demolition, draw the room accurately and mark door swings, fixture clearances, storage depth, and traffic flow. Consider how two people use the space, where towels hang, how cabinet doors open, and whether the bathroom should become more accessible over time.
|
Planning Area |
Questions to Ask |
Why It Matters |
| Shower or tub | Who uses it, and is a tub still needed? | Determines whether a tub-to-shower conversion, walk-in shower, or combination is practical. |
| Vanity | How much counter and drawer space is required? | Improves storage and reduces clutter. |
| Toilet | Is there comfortable side and front clearance? | Affects usability, cleaning, and privacy. |
| Door | Does the swing block a fixture or walkway? | Prevents collisions and wasted space. |
| Lighting | Are task, ambient, and shower areas covered? | Supports grooming, safety, and comfort. |
| Accessibility | Could future users need easier entry or support? | Allows safer planning before walls and tile are finished. |
Mistake 3: Choosing materials only by appearance
Bathroom finishes need to tolerate humidity, splashes, repeated cleaning, and temperature changes. Highly polished floor tile may look luxurious but become slippery. Natural stone can require sealing and special cleaners. Wood-based products need appropriate construction and protection. Some wall paints perform poorly in humid rooms.
A balanced selection process considers slip resistance, water absorption, cleaning, grout joints, durability, repairability, and visual scale. Large-format tile can reduce grout lines, but the substrate must be flat and the installation planned carefully. Small mosaic tile can improve traction on shower floors but creates more grout to maintain.
Mistake 4: Underestimating ventilation
Steam that remains in the room can contribute to condensation, peeling paint, odors, and moisture stress. An exhaust fan should be selected and routed appropriately for the room and local requirements. It also needs to be used long enough after bathing to remove lingering humidity.
A window can provide natural ventilation but is not always a substitute for mechanical exhaust, especially during cold or wet weather. Duct routing, exterior termination, noise level, and controls should be planned before the ceiling is closed.
Mistake 5: Using one light source
A central ceiling light rarely provides good illumination at the mirror or inside a shower. Bathroom lighting works best in layers: ambient light for the room, task light near the mirror, and wet-location-rated lighting where needed. Light temperature and color rendering influence how skin tones, tile, paint, and finishes appear.
Avoid placing a strong downlight directly above the face because it can create shadows. Side lighting or a well-designed mirror fixture often provides more even illumination for grooming.
Mistake 6: Forgetting storage until the end
Storage should be part of the layout, not an accessory added after the room is complete. Vanity drawers, recessed medicine cabinets, shower niches, linen cabinets, and open shelves each solve different needs. The goal is to keep frequently used items reachable while protecting towels and supplies from excessive moisture.
A vanity with deep doors may waste space around plumbing. Drawers, pull-outs, and internal organizers often make compact rooms more efficient. Recessed storage can help, but wall cavities must be checked for plumbing, electrical lines, and structural limitations.
Mistake 7: Starting without a complete scope
A bathroom remodel often reveals conditions hidden behind finishes. The project plan should address demolition, disposal, framing repairs, plumbing, electrical work, waterproofing, ventilation, surfaces, fixtures, paint, trim, and final sealing. Allowing for unknown conditions is more realistic than assuming every wall and floor is perfect.
Homeowners considering bathroom remodeling services can work with Intra Flooring on assessment, layout planning, material selection, demolition, waterproofing, shower or bathtub installation, tile, flooring, vanities, countertops, cabinets, and finishing details in Kent, Seattle, and nearby Washington communities.
A smarter order of decisions
1. Define who uses the bathroom and what problems must be solved.
2. Measure the room and confirm the layout and fixture clearances.
3. Plan plumbing, electrical, ventilation, and accessibility needs.
4. Select the waterproofing and substrate system.
5. Choose durable flooring, wall finishes, vanity, countertop, and fixtures.
6. Coordinate lighting, mirrors, storage, hardware, and paint.
7. Confirm lead times and inspect materials before demolition begins.
Frequently asked questions
What should be planned first in a bathroom remodel?
Start with the room’s function, layout, water management, plumbing, electrical needs, and ventilation. Decorative finishes should follow those technical decisions.
Is a walk-in shower better than a bathtub?
It depends on the household. A walk-in shower may improve accessibility and daily convenience, while a bathtub can be important for young children, soaking, or resale preferences.
What flooring is practical for bathrooms?
Porcelain or ceramic tile, waterproof vinyl, and selected LVP products are common choices. Slip resistance, water exposure, substrate preparation, and transition details should guide the decision.
Do bathroom walls need special paint?
Bathrooms generally benefit from a durable, washable finish appropriate for humidity. Surface preparation and ventilation have a major effect on paint performance.
How can a small bathroom feel larger?
Use a clear layout, good lighting, appropriately scaled fixtures, consistent materials, wall-mounted or visually lighter storage, and fewer abrupt visual breaks.
Why do bathroom renovation costs vary so much?
Cost depends on room size, layout changes, hidden damage, plumbing and electrical work, waterproofing, tile complexity, fixtures, cabinetry, countertops, and finish level.
Conclusion
A successful bathroom remodel is built from the inside out. Waterproofing, layout, ventilation, and installation quality protect the investment, while thoughtful storage, lighting, and finishes make the room pleasant to use. Avoiding technical shortcuts is the most reliable path to a bathroom that still looks and performs well years after completion.