


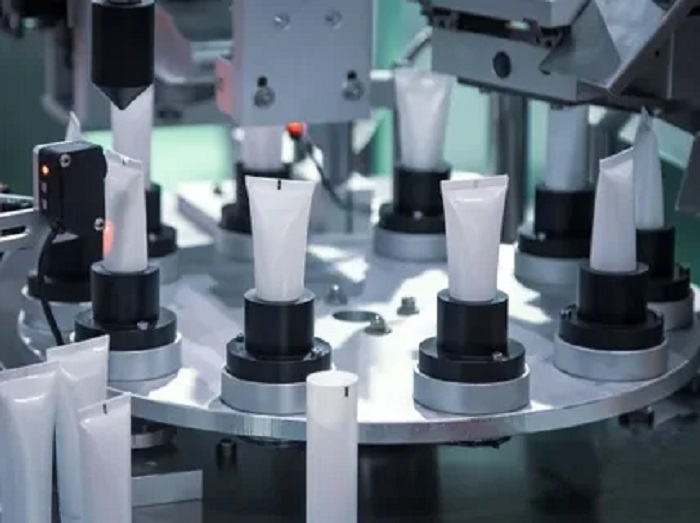
Cosmetic tube manufacturing process explained
Cosmetic tubes may look simple, but their production involves several carefully controlled stages. Each step affects the tube’s appearance, barrier performance, filling compatibility, and ability to protect the formula throughout its shelf life.
The exact process varies depending on whether the packaging is a PE extrusion tube, an aluminum barrier laminate tube, or a plastic barrier laminate tube. However, most cosmetic tube projects move through a similar sequence, beginning with material selection and ending with inspection and shipment.
Understanding this process helps cosmetic brands communicate more effectively with manufacturers and identify the specifications that must be confirmed before mass production.
Step 1: Selecting the Tube Material
Production begins with material selection. Polyethylene is widely used for extrusion tubes because it is flexible, lightweight, and chemically resistant.
Low-density polyethylene creates a softer tube that is easy to squeeze. High-density polyethylene provides greater stiffness and shape retention. Manufacturers may combine both materials to achieve a specific feel.
For products that need stronger protection against oxygen, moisture, light, or fragrance loss, buyers may select laminate structures. Aluminum barrier laminate contains a thin aluminum layer, while plastic barrier laminate uses a plastic-based barrier such as EVOH.
The choice should be based on formula compatibility, shelf-life requirements, sustainability goals, and expected user experience.
Step 2: Extruding or Forming the Tube Body
For PE extrusion tubes, plastic resin is heated until it melts. The material is then pushed through a circular die to create a continuous hollow sleeve.
The sleeve is cooled and cut into individual tube bodies. The manufacturer controls the diameter, wall thickness, length, color, and surface finish during this stage.
Laminate tubes follow a different process. Their material begins as a flat, multi-layer web. The web is formed into a cylinder, and the side edges are joined to create a longitudinal seam.
Because laminate material is flat before forming, detailed graphics can often be printed before the body is assembled.
Step 3: Printing and Surface Decoration
Once the tube body is prepared, it can be decorated according to the brand design.
Common decoration methods include:
- Offset printing
- Silk-screen printing
- Hot stamping
- Pressure-sensitive labeling
- Matte or gloss varnishing
- Soft-touch coatings
- Metallic and holographic effects
Offset printing works well for multi-color graphics and general cosmetic packaging. Silk-screen printing provides strong color density and is suitable for bold logos or text. Hot stamping adds metallic details that can strengthen a premium appearance.
The artwork must account for the tube seam, shoulder area, filling seal, and cap orientation. Brands should always review production-ready artwork rather than relying only on digital mockups.
Step 4: Forming and Attaching the Shoulder
The shoulder connects the tube body to the neck and closure.
During heading, the end of the tube body is placed into a mold. Heated plastic is then shaped to form the shoulder and neck. The shoulder is permanently bonded to the tube body.
This stage determines the neck size, thread design, dispensing opening, and compatibility with the closure.
Different products require different openings. A thick body cream may need a wider orifice, while an eye treatment or concentrated gel may use a narrow nozzle for controlled dispensing.
Step 5: Manufacturing and Installing the Closure
Caps are normally injection-molded separately. Common options include screw caps, flip-top caps, disc-top closures, nozzle caps, and specialty applicators.
The closure must fit the neck accurately and remain secure during filling, transportation, and repeated consumer use.
Manufacturers may test cap torque, opening force, hinge durability, leakage resistance, and alignment. Color matching between the cap and tube body is also important, especially for monochrome packaging designs.
Step 6: Preparing the Tube for Filling
The shoulder end is closed with the cap, while the opposite end remains open. The cosmetic product is inserted through this open end during filling.
After filling, the open end is heat-sealed, coded, trimmed, and sometimes shaped into a specific crimp pattern.
The tube dimensions must match the customer’s filling equipment. Incorrect diameter, stiffness, or open-end dimensions can cause feeding and sealing problems.
Experiencedcosmetic tube suppliersnormally request details about the formula, filling line, sealing method, and production speed before confirming the final specification.
Step 7: Quality Inspection
Quality control is carried out throughout production rather than only at the end.
Typical checks include:
- Tube diameter and length
- Wall thickness
- Printing accuracy
- Color consistency
- Cap fit and torque
- Shoulder strength
- Seal performance
- Surface scratches
- Leakage resistance
- Drop and compression resistance
Finished packaging may also undergo formula compatibility, aging, and transport tests.
Final Packaging and Shipment
Approved tubes are cleaned, counted, packed into protective cartons, and arranged to prevent deformation or surface damage.
The cartons should protect the tubes from dust, pressure, moisture, and excessive heat during transportation.
The cosmetic tube manufacturing process combines material science, printing, molding, assembly, and quality management. Buyers who understand these stages can provide clearer specifications, evaluate samples more effectively, and reduce costly changes after production has started.