


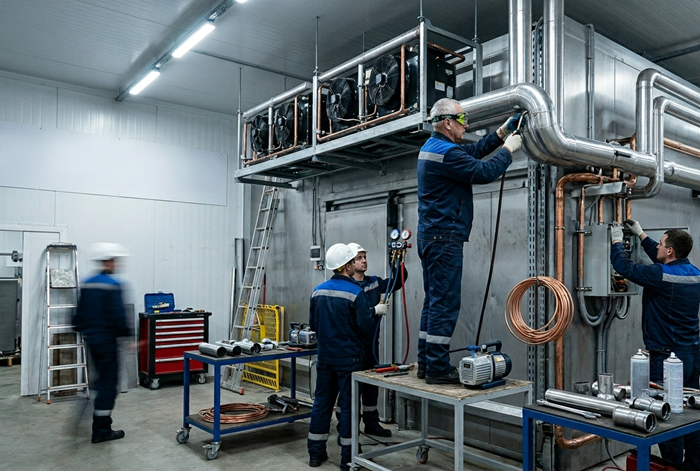
Installation of commercial refrigerators: installation rules, connection and safety
Installing a commercial refrigerator Commercial Air Conditioning Repair is more than just “putting the cabinet in place and plugging it in.” Proper installation affects temperature stability, compressor lifespan, energy consumption, and product safety in retail spaces, restaurant kitchens, warehouses, and laboratories.
Even high-quality equipment can perform poorly due to poor placement, poor ventilation, improper electrical connections, and unprepared floors. Below are practical rules and tips to help you organize a proper installation and reduce the risk of breakdowns.
Installation and Startup: Practical Tips
One of the most common causes of overheating is insufficient airflow around the condenser. Maintain the manufacturer’s specified clearances from walls and furniture, and do not block the grilles. Dust on the condenser impairs heat transfer, so schedule regular cleaning.
Drainage Connection and Condensate Monitoring
If the unit is designed for condensate drainage, check the connections for leaks and ensure the drain is directed correctly. Overflowing water can cause slippery floors, unpleasant odors, and damage to the finish. It is important that staff understand the location of the drain pan and how to sanitize it.
Initial Startup Procedure and Mode Checking
After installation, do not rush to load the unit. Allow the equipment to reach operating temperature and check the actual readings.
- Visual inspection: Check for damage, distortion, or abnormal noise.
- Start-up and stabilization: Wait until the set mode is reached.
- Thermostat check: Compare the built-in indicator reading with the control thermometer.
- Door and seal test: Check for air leaks and a smooth fit.
- Test load: Load gradually, without blocking the air ducts inside the chamber.
Operating tip: Do not place products close to the back wall or overload the shelves – this disrupts air circulation and creates “warm spots.”
Maintenance and common mistakes that are easy to avoid Avoid
Regular maintenance is cheaper than repair. Periodically check the condenser for cleanliness, the condition of the seals, the absence of ice, the proper closing of the doors, and temperature stability. If multiple appliances are installed nearby, the heat load increases—sometimes it is necessary to review the room ventilation or the loading schedule. In cases where the cooling system is connected to HVAC equipment, commercial air conditioning repair may also be necessary to avoid overheating the installation area and a decrease in the refrigerator’s efficiency.
Summary: Proper installation of a commercial refrigerator begins with preparing the room, properly connecting and maintaining clearances, and ends with startup monitoring and regular maintenance. This approach reduces downtime, protects products, and helps the equipment operate reliably for years.
Summary: How to prepare a site for a commercial refrigerator
To ensure quick and safe installation, it is necessary to check the dimensions and tolerances in advance, coordinate the delivery route, ensure the site is ready, and ensure access around the equipment for maintenance. Below is a brief checklist to help address key risks.
Pre-Delivery and Placement Checklist
- Measurements of openings and corridors: Record the width, height, and depth of passages, take into account protrusions (door handles, trim, handrails, radiators), as well as the ability to turn on landings and in vestibules.
- Checking doors and doors: Check in advance whether it is possible to remove doors from their hinges, dismantle door closers/stops, and temporarily remove obstacles along the route.
- Delivery Route Assessment: Stairs, elevators, ramps, slopes, thresholds, floor coverings, height/width restrictions, unloading area, and room for maneuvering trolleys.
- Floor Loading: Ensure that floors and flooring can support the weight of equipment with product; If necessary, prepare distribution pads/plates for handling and installation.
- Location: Leave adequate clearances for ventilation and maintenance, ensure free access to service panels, filters, condenser, drainage, and shut-off valves.
- Level and Stability: Check the floor level, eliminate any distortions, and prepare points for adjusting the legs/supports and securing the equipment, if necessary.
- Utility Points: Determine the location of the power supply, grounding, socket/circuit breaker, and drainage (if necessary) in advance, ensuring that cables and hoses do not get caught under the enclosure or become kinked.
- Safety During Movement: Protect wall corners and door frames, use belts/slings and appropriate handling equipment, and assign a person responsible for route coordination.
- Acceptance before startup: After installation, inspect the housing and unit for damage, check for completeness, and verify that the installation location meets the manufacturer’s requirements.
- First, measure: openings, turns, route, and installation point.
- Then prepare: the floor, access areas, utility connections, and unloading area.
- Then place: level, provide clearances, and allow access for service.
Result: Accurate measurements of openings, a pre-agreed delivery route, and thoughtful placement of equipment are three conditions that save time on installation, reduce the risk of damage, and ensure proper operation. refrigerator without overheating and frequent service stops.