


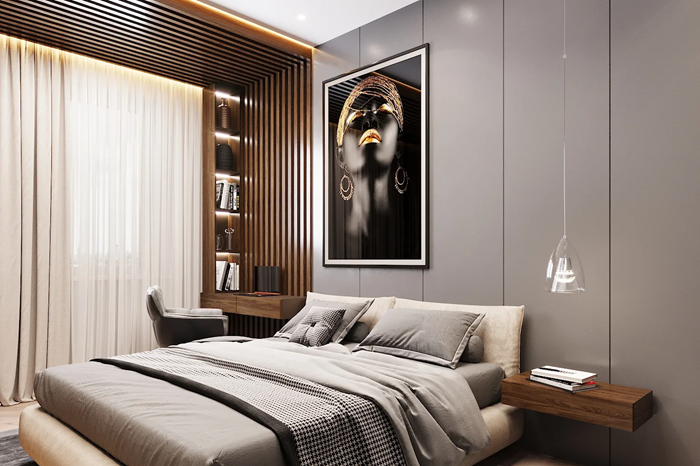
3D real estate visualization from model preparation to rendering and presentation
3D real estate visualization helps present a property before construction or renovation begins, including future layouts, materials, lighting, and ambiance. It’s used in sales, investor presentations, design approvals, and the preparation of marketing materials.
A high-quality result depends on a precise initial brief, a well-designed scene, realistic materials, lighting, and careful post-processing. Below is a practical workflow suitable for apartments, houses, commercial spaces, and exteriors.
Production Process: From Model to Final Render
Start with a “box” of dimensions: walls, ceilings, openings, and stairs. Pay attention to thicknesses and joints—realism is often compromised by incorrect geometry (walls that are too thin, incorrect slopes, missing baseboards and trim). Take complex elements (furniture, plumbing, lighting) from trusted libraries or model them using blueprints, avoiding excessive polygonality where it doesn’t affect the frame.
Materials and Textures: Realism through PBR
Use physically based materials: define reflections, roughness, and microrelief. It’s important to maintain the scale of textures (e.g., boards, tiles, bricks) and add subtle variations to prevent surfaces from appearing “plasticky.”
- Check UV mapping on large surfaces to avoid stretching.
- Add chamfers (rounded edges) to corners – they catch the light and make the object “live.”
- Follow the logic of materials: metal reflects differently than varnish, and matte paint reflects differently than plastic.
Light and Camera: The Key to Persuasiveness
For interior scenes, a combination of natural light from windows and soft fill light often works. Exteriors require careful manipulation of the sun, sky, and surroundings. Adjust the exposure as in photography: avoid burning out windows or blowing out shadows.
- Choose the right time of day for the task: daylight for layout and materials, “golden hour” for atmosphere, and evening for façade lighting.
- Mount the camera at a realistic height (usually 140–160 cm for interiors) and avoid excessively wide angles.
- Maintain verticality: sloping walls reduce the credibility of the visualization.
Render, Post-Processing, and Quality Control
Render at a resolution sufficient for the intended use: web, print, and outdoor advertising. In post-processing, adjust white balance, contrast, and subtle sharpening, and add atmosphere (soft haze, subtle vignetting) only if it doesn’t distort the materials. Within arch visualization, it’s important to maintain verisimilitude: the image should be attractive but honest to the project.
The final step is checking the specifications: do the layout, finishes, furniture, views from the windows, and lighting match? The sooner you capture the requirements and images, the fewer revisions and the more consistent the quality of the visualizations for any real estate property.
Brief and collection of initial data: specifications, plans, elevations, style, references
High-quality 3D real estate visualization begins not in the 3D editor, but in the brief. The more accurately the initial data is collected, the fewer revisions, the faster the production, and the more predictable the result in terms of quality, deadlines, and budget.
The goal of this stage is to transform wishes and disparate materials into a clear specification. Ultimately, the visualizer understands what exactly needs to be modeled, how it should look, what materials and lighting to use, the format to submit, and the criteria for accepting the work.
Checklist of Initial Data and What to Include in the Specification
- Purpose and Use Case: Sale of a New Building, Interior Design Project, Tender, Investor Presentation; Location (Website, Brochure, Billboard, Marketplaces).
- Object and Scope of Work: Exterior/Interior, Number of Rooms/Views, Whether Animation/360/VR is Required, Floor Plans and Environment Required.
- Plans and Geometry: Floor Plans with Dimensions, Explication, Nodes, Anchors; Preferably DWG/PDF with a legible scale.
- Skirtings and elevations: elevations/wall skirtings, door/window lists, opening and elevation markings.
- Heights and elevations: ceiling heights, floor levels, differences in height, window sill elevations, slab thicknesses, parapet/roof heights.
- Materials and specifications: list of finishes, manufacturers/collections, article numbers, RAL/NSC, types of glass, metal, wood; photos of samples if available.
- Style and artistic requirements: target style (Scandinavian, minimalist, neoclassical, etc.), degree of “realism”, atmosphere, season/time of day, density of decor, presence of people/vehicles.
- References: 5–15 examples with notes on “what exactly you like” (light, composition, materials, color, framing); Individual anti-references “what not to do.”
- Cameras and composition: list of angles, key areas, perspective limitations (vertical, focal length), requirements for “selling” shots.
- Lighting: interior lighting scheme (groups, temperatures, types of luminaires); exterior lighting orientation and desired lighting characteristics.
- Formats and technical parameters: resolution, aspect ratio, color space/profile, source code requirements (PSD/EXR), masks/pass channels, model/texture rights requirements.
- Approval process: stages (rough blocking, materials, lighting, final), number of iterations, response deadlines, decision makers.
- Collect the materials into a single structure: plans/facades/unfoldings, specifications, references, brand restrictions, examples of desired presentation.
- Turn this into a specification: list specific deliverables (number of frames, angles, format), quality criteria, and approval stages.
- Approve assumptions in writing: all unknown parameters must be either filled in or agreed upon as assumptions.
Bottom line: a strong brief is an agreement on the outcome in measurable parameters: geometry, materials, style, lighting, angles, formats, and the revision process. When the initial data is collected and recorded in the specifications, 3D visualization becomes a controlled production process, not an endless “choosing to suit one’s tastes.”